
Whether you are a beginner or a master player, an out-of-tune instrument isn’t going to sound great. One of the easiest ways to improve the tone of your banjo is to change the strings. With new fresh strings, you will get better tone quality, better finger response, a wider range of dynamics, tones, and much more. To get that result, you need to know how to restring a banjo.
So How to Restring a Banjo?
The most common way to restring a banjo is to start by removing the old strings. Then, take the new strings and thread them through the banjo’s tuners and under the headstock. Finally, tie the strings in a knot at the tuners.
How to Restring a Banjo?
Related Read: Best Banjo for Beginners
When To Change Banjo Strings?
One of the common questions all beginner banjo players have – is when and how to change banjo strings? There is no definite timeframe for that as it depends on how much the instrument is played. Also, external factors like climate, maintenance, cleaning, etc determine how fast the strings deteriorate.
Commonly, the 4th string is the first string to wear out and others gradually follow. So, when the 4th string starts losing noticeable sustain and volume and won’t stay in tune properly, it is probably time to restring your banjo.
Another easy way to tell if your strings need changing is to run your fingers down the strings. The strings should feel smooth and silky. However, if the strings feel rough or dirty, then it is definitely time for a change.
Off-Topic: In case if you need to replace your banjo strings, here are some decent deals to grab:
No products found.
How To Restring A Banjo Step by Step
Share this Image On Your Site
You don’t need many tools to change your banjo strings, rather a few tools are more than enough. You’ll need a fresh pack of strings, a string winder, a wire cutter, a tuner, and a pencil.
To learn how to string a banjo, first hold your instrument in the playing position to determine the string set. The top string is the furthest away from your chin in this position and the bottom string is the nearest to your chin. The top string is also called the 1st string. This positioning is for a right-handed person, so if you are left-handed then you need to reverse the position.
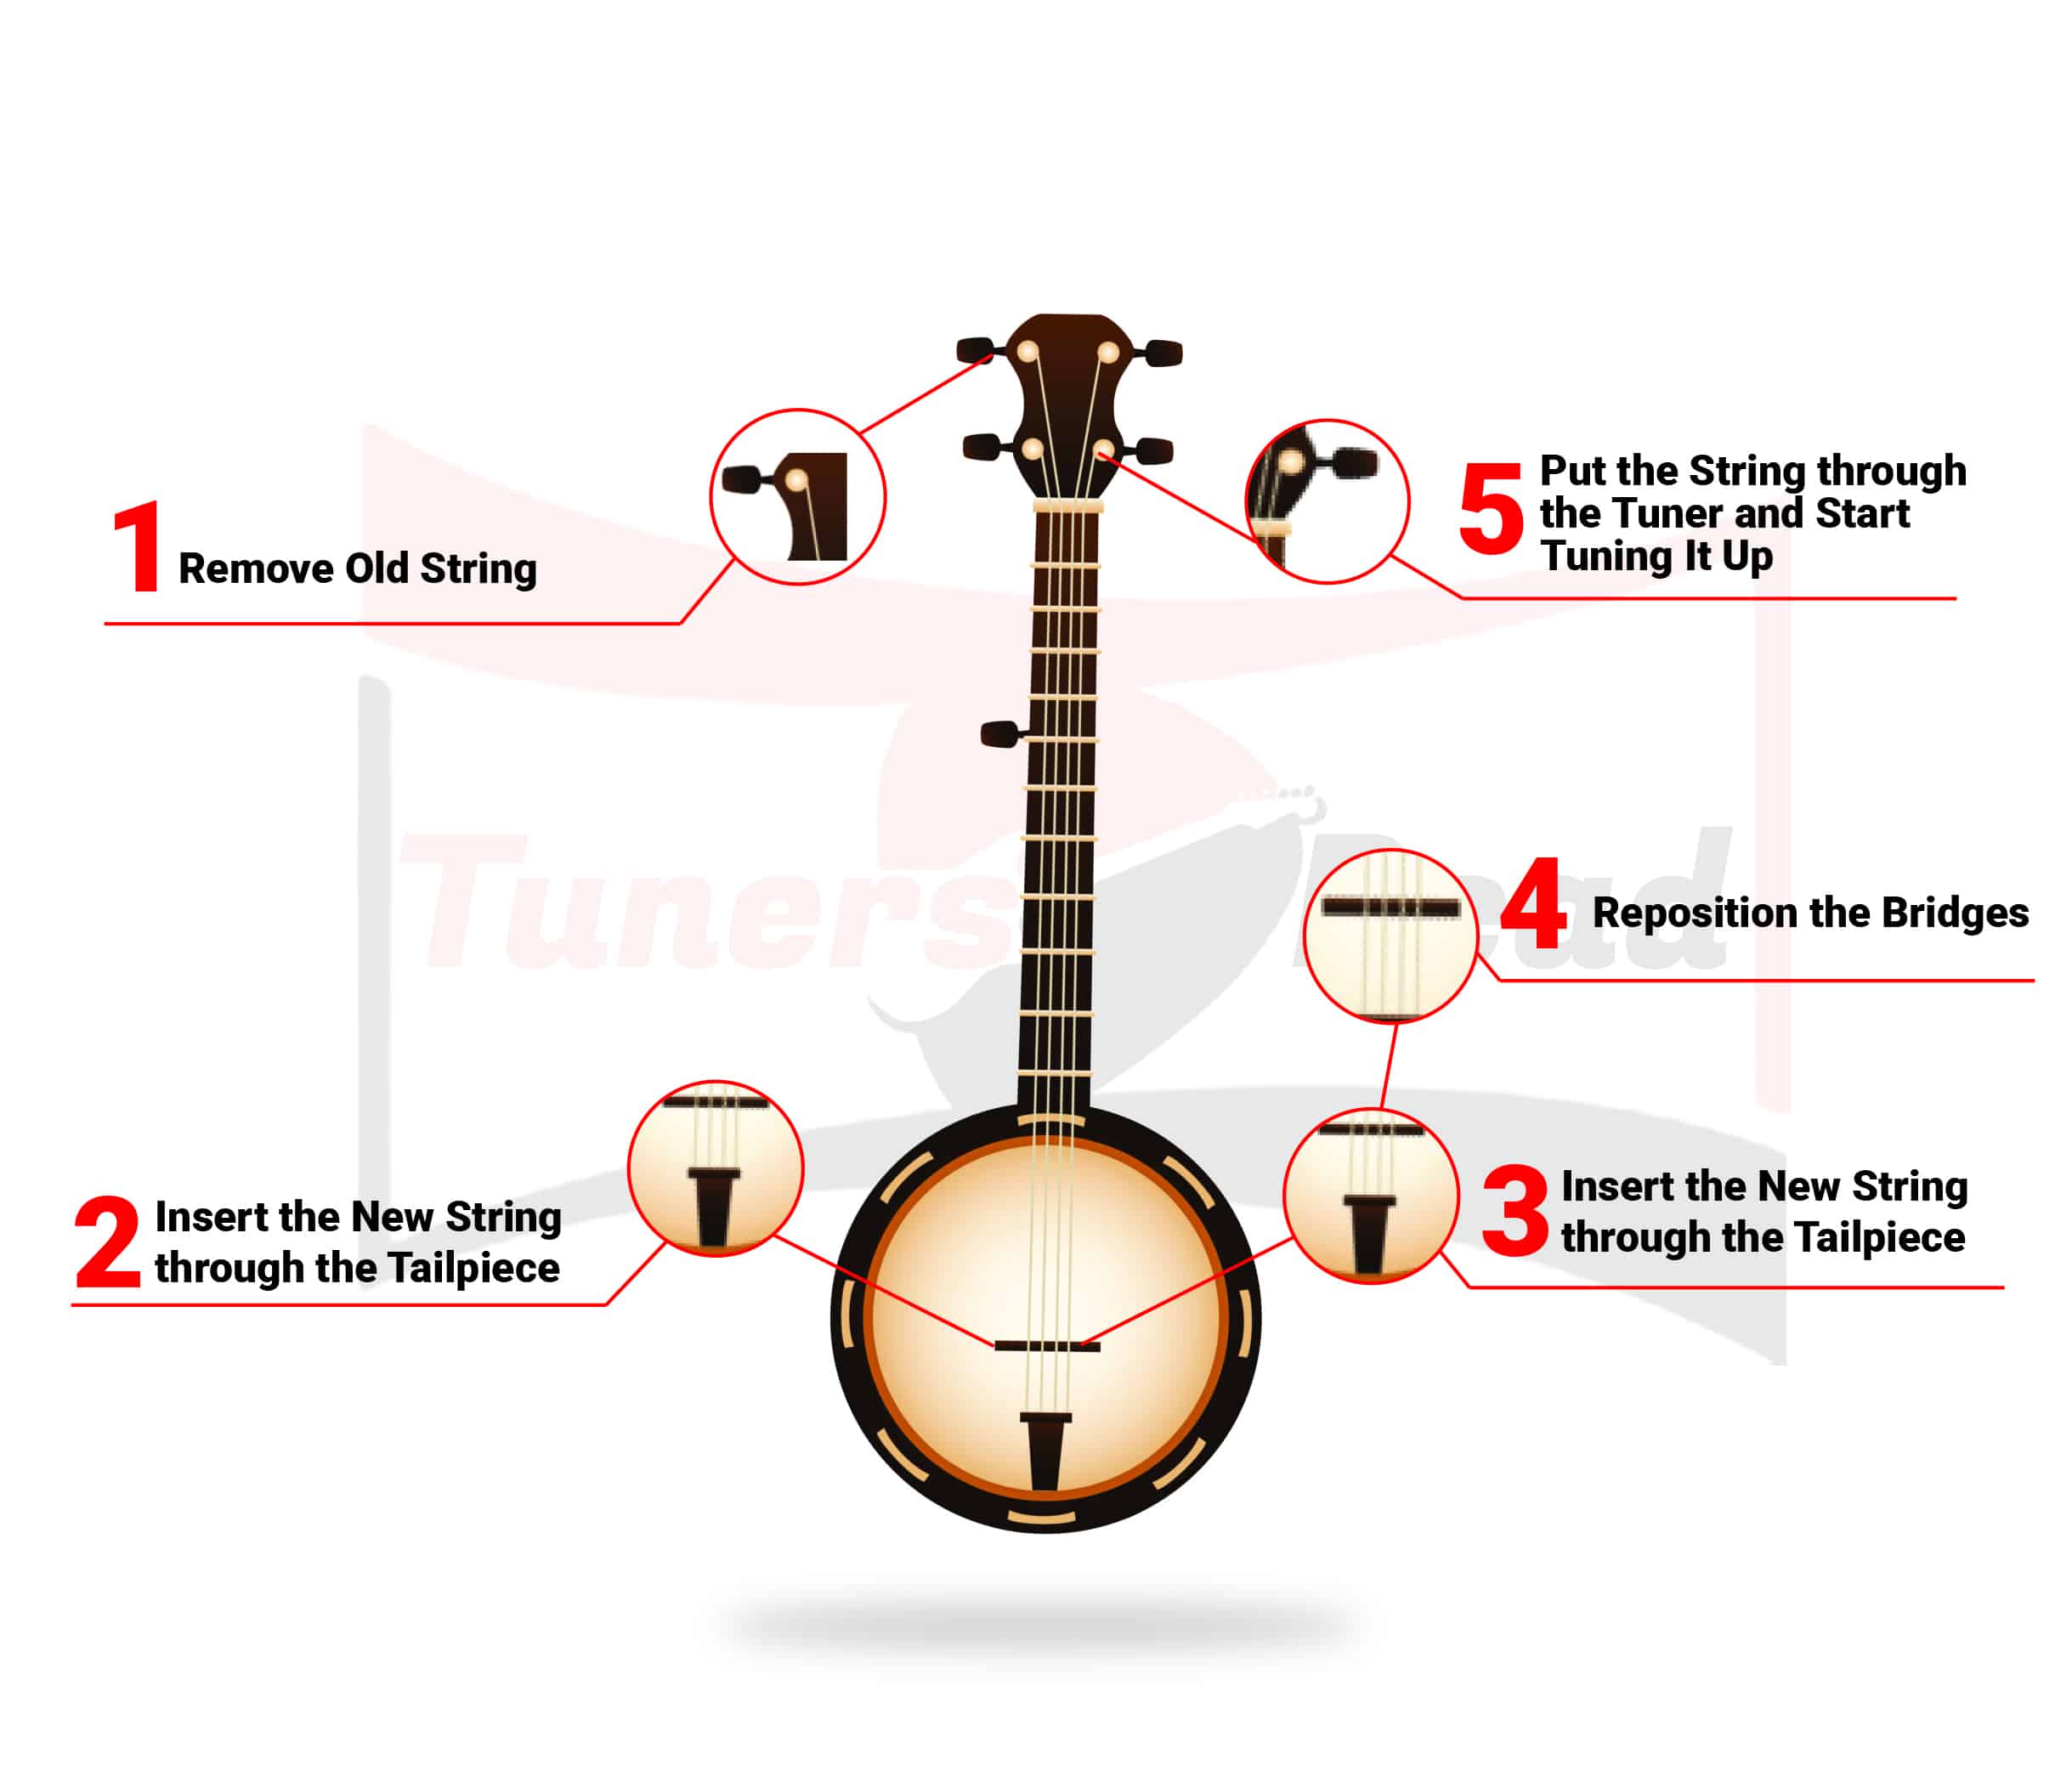
Step 1: Remove Old String
Slack off the 1st string and unwind it on the tuning peg. Then remove the string from the tailpiece.
Step 2: Insert the New String through the Tailpiece
Attach the new string to the tailpiece and hold some tension on the string to keep it attached to the tailpiece/bridge.
Step 3: Hook the Loop End of the String on the Tailpiece
Make sure the loop fits over the hook on the tailpiece. To make the loop wider or bendy, just stick a pencil through and roll the loop around. Then slip the loop end over the hook and run the string up over the tailpiece.
Step 4: Reposition the Bridges
All instruments with tailpieces have movable bridges so while removing strings, bridges also come off. Play the harmonic of the 1st string at the 12th fret and compare it to the fretted note. If the fretted note is sharper, move the bridge toward the tailpiece. And if the fretted note is flat, then move the bridge toward the neck.
Step 5: Put the String through the Tuner and Start Tuning It Up
Now that the string is firmly attached to the tailpiece, pass the string through the hole on the tuner post. Hold up a little slack on the string with one hand and hold the peg with others. Bring the free end of the string between the pegs, around the post, and underneath the string. Pull the free end back over the string and wind up the string on the peg. As soon as it is tuned to pitch, just cut off the excess string.
Fit the other strings using the same method as the 1st string to tune it to pitch and your job is done here.
Tips
- Change one string at a time
- Start from the bottom and work to the top
- Cut the end of each string at the tuner peg leaving about a ¼-inch length of string
- Do not over-tighten the strings as it causes string breakage
For a change, better to use the same set of strings as before otherwise the intonation may change with a heavier or lighter set
Conclusion
To sum up, how to restring a banjo is not that a difficult task. With time and practice, changing the strings will become your second nature. Moreover, keeping the banjo covered, regularly cleaning and oiling the strings, frequent tuning, etc can add longevity to your instrument. Regular and good care ensures less chance of strings wearing down.
However, if you are still not sure about how to replace banjo strings, then take it to the experts or professionals for tuning. Better safe than sorry!
Related Read: Best Bluetooth Speakers for Classical Music [Review with Buyer’s Guide]
Last update on 2024-03-24 at 14:43 / Affiliate links / Images from Amazon Product Advertising API
